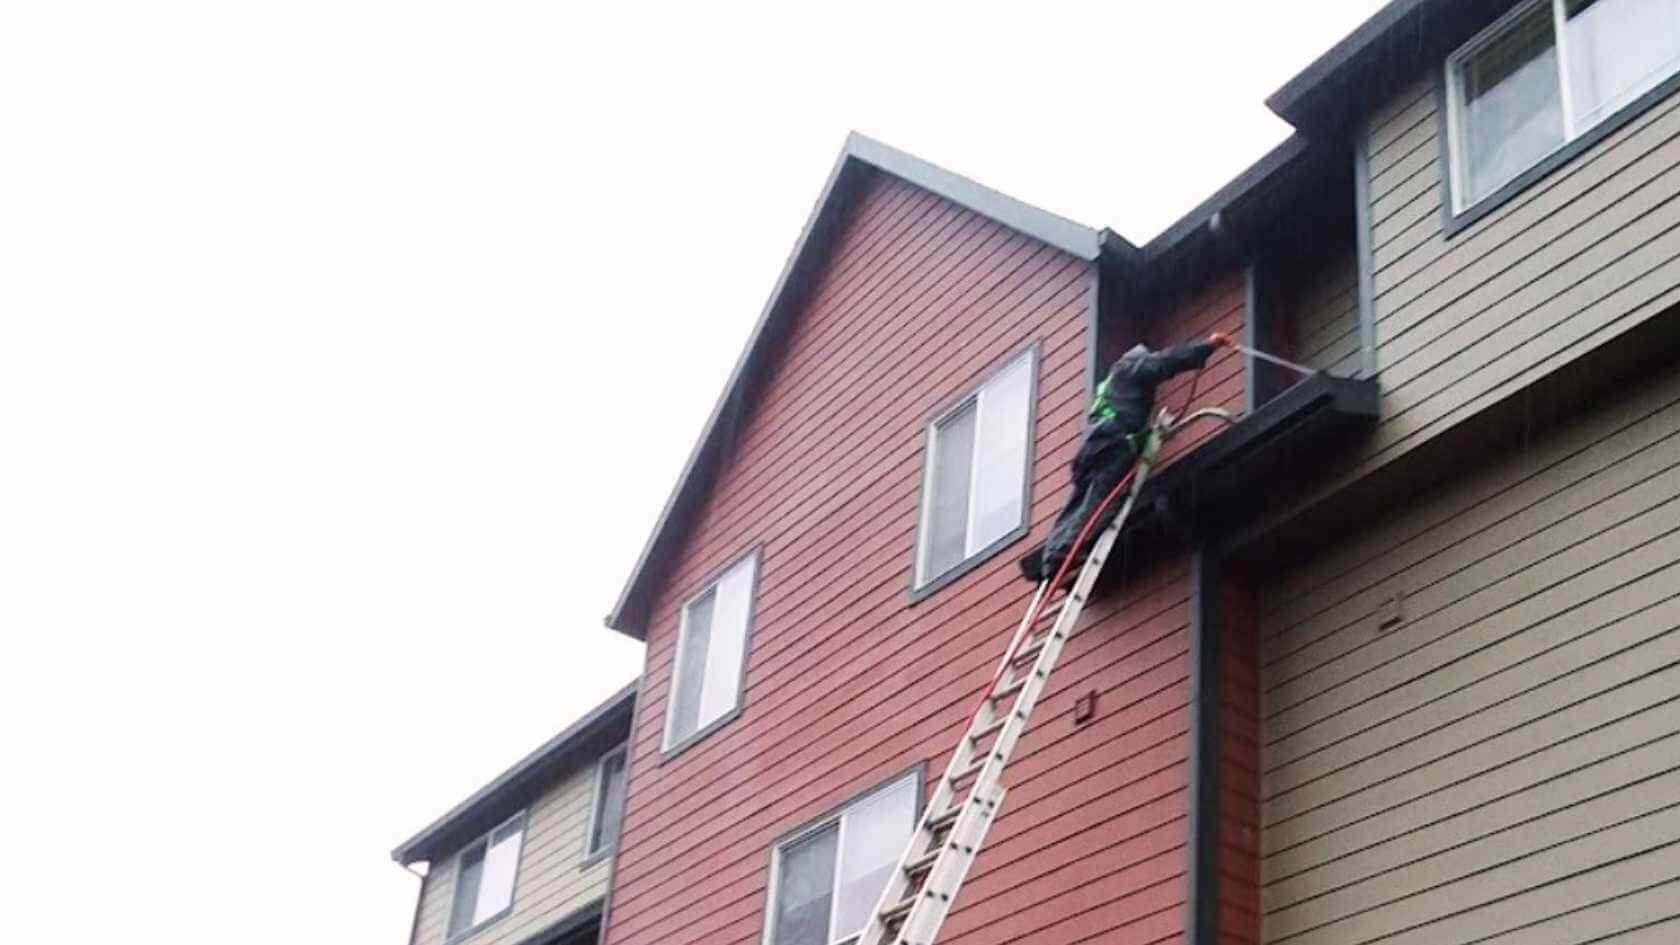
The Importance Of Keeping Your Gutter Clean During Winter

Gutter Cleaning during Winter

Winter is a season of cozy nights, snow-covered landscapes, and festive cheer—but it also brings unique challenges for home maintenance. Among these is the critical task of keeping your gutters cleanWhile they may seem like a small detail in the grand scheme of home care, gutters play a vital role in protecting your property from winter weather woes.

In this blog, we’ll explore why gutter cleaning during winter is important, the potential hazards of neglecting this task, and practical tips for keeping your gutters in tip-top shape.  Whether you’re a seasoned homeowner or new to maintaining a property, this guide will help you keep your home safe and sound this winter season.


How Winter Impacts Your Gutters

  1. Prevent Water Damage to Your Home – When gutters are clogged, melting snow and ice have nowhere to go, causing water to spill over the edges. This can lead to water seeping into your walls, ceilings, and insulation, creating expensive repair issues such as mold, mildew, and structural weakening. 
  2. Avoid Foundation Cracks and Settling – Overflowing water from clogged gutters can pool around your home’s foundation. During freezing temperatures, this water can seep into small cracks and expand as it freezes, worsening the cracks and potentially leading to settling or shifting in your foundation.
  3. Preserve Your Landscaping and Walkways – Excess water spilling from your gutters can erode soil, damage plants, and create icy walkways. These issues not only detract from your home’s curb appeal but can also pose safety hazards during winter.
  4. Protect Your Gutter System From Rust and Corrosion – Leaves, debris, and moisture trapped in your gutters can speed up rust and corrosion, especially during winter’s wet conditions. Regular cleaning helps maintain the integrity and longevity of your gutter system.
  5. Avoid Pest Infestations – Clogged gutters filled with leaves and debris create a cozy habitat for pests like rodents, birds, and insects. Winter makes them even more likely to seek shelter in these areas, potentially leading to infestations near your home.
  6. Safeguard Your Roof – Ice dams, caused by blocked gutters and poor drainage, can trap water on your roof. This water can seep under shingles and into your home, causing leaks and structural damage. Keeping gutters clean ensures water and melted snow flow away from your roof as intended.


How to Maintain Clean Gutters During Winter

Gutter Cleaning Maintenance during Winter


  1. Clean Your Gutters Before the First Snowfall
    – Prevention is key when it comes to winter gutter cleaning. Remove leaves, twigs, and debris from your gutters in late fall before snow and ice set in. Starting with clean gutters minimizes the risk of clogs and helps water flow freely when snow begins to melt. 
  2. Install Gutter Guards 
    – Gutter guards are an excellent investment to reduce debris accumulation. These covers prevent leaves, sticks, and other materials from entering your gutters while allowing water to flow through. They’re especially useful during winter, as they can reduce the need for frequent cleanings.
  3. Regularly Inspect Gutters and Downspouts
    – Throughout winter, make it a habit to check your gutters and downspouts for any blockages or damage. Snow and ice can cause cracks or sagging, so addressing issues promptly can prevent more significant problems like water damage or ice dams. 
  4. Rinse with Low-Pressure Water
    – On milder winter days, use a low-pressure hose to rinse out any small debris that may have accumulated. Be cautious not to use high-pressure water, as it could freeze or damage your gutter system in colder temperatures.
  5. Dry if Necessary
    – If water remains in your gutters after cleaning or rinsing, it’s a good idea to dry them out to prevent ice formation. Use a clean towel or sponge to remove excess moisture, especially in areas prone to pooling water.


How Often Should You Clean Your Gutter During Winter?

During winter, how often you should clean your gutters depends on your climate and environment. In areas with heavy snowfall or frequent ice, monthly cleaning is recommended to prevent blockages and ice dams. After major storms, it’s essential to check for debris or ice buildup and clean as needed. In milder winter climates, once or twice during the season may suffice, especially if gutters are inspected regularly for signs of overflow or clogs. Staying proactive ensures your gutter system functions properly, protecting your home from potential water damage and freezing issues.


Is Professional Gutter Cleaning Cleaning Worth It?

Professional gutter cleaning is often worth the investment, especially if you lack the time, tools, or ability to safely handle the task yourself. Experts bring specialized equipment and knowledge to thoroughly clean gutters, address hard-to-reach areas, and identify potential issues like leaks or structural damage. Hiring professionals reduces the risk of accidents, particularly in multi-story homes or during icy winter conditions. Additionally, their expertise can extend the lifespan of your gutter system and prevent costly repairs caused by neglect, making it a smart choice for homeowners prioritizing convenience and safety.


Final Thoughts

Maintaining clean gutters during winter is not just a matter of convenience—it’s an essential part of protecting your home from the harsh effects of the season. From preventing water damage and foundation cracks to safeguarding your roof and landscaping, clean gutters play a vital role in keeping your property safe and functional.

By taking proactive steps like clearing debris before the first snowfall, inspecting regularly, and investing in tools like gutter guards, you can avoid costly repairs and enjoy peace of mind all winter long. Remember, a little effort now can save you significant time, money, and stress.

Clean gutters are a cornerstone of winter home maintenance, protecting your property from water damage, ice dams, and structural issues. Whether you choose to tackle the task yourself or hire professionals, keeping your gutters clear ensures they function effectively throughout the season. By staying proactive, inspecting regularly, and addressing potential problems early, you can save time, money, and stress. A well-maintained gutter system not only safeguards your home but also provides peace of mind, allowing you to focus on enjoying the winter season without worry.
Can you pressure wash solar panels?

Can you pressure wash solar panels

As solar energy becomes an increasingly popular choice for homeowners and businesses, maintaining the efficiency of solar panels is essential. One common question arises: can you pressure wash solar panels?

While pressure washing is a highly effective method for cleaning many surfaces, it’s important to understand the specific needs of solar panels to avoid damage and ensure optimal performance.

In this article, we’ll explore the best practices for cleaning solar panels, why you can’t use a pressure washer, and alternative methods to keep your panels functioning at their best.


Can You Use a Pressure Washer on Solar Panels?

Using a pressure washer on solar panels is generally not recommended.

Here’s why:

  1. Delicate Surface: Solar panels are delicate and can be easily damaged by the high-pressure water jets. This can lead to cracks, scratches, or even loosening the panels from their mounts.
  2. Seal Damage: The high pressure can damage the panels, seals, or wiring, potentially leading to leaks or other issues
  3. Wiring Concerns: High-pressure washing can force water into the electrical components of the panels, potentially causing malfunctions or short circuits.


Why Solar Panel Cleaning is Important

Cleaning solar panels is essential for maintaining their efficiency and ensuring optimal energy production. Accumulated dirt, dust, and debris can significantly block sunlight, leading to reduced performance and lower energy output. Regular cleaning not only helps maximize energy generation, which translates to cost savings on energy bills, but it also extends the lifespan of the panels by preventing potential damage from grime buildup. Additionally, keeping panels clean enhances the aesthetic appeal of your property and allows for early detection of any issues, such as cracks or faulty connections, ensuring that your investment continues to operate effectively. Overall, proper maintenance through regular cleaning is crucial for the longevity and performance of solar energy systems.


The Best Way to Clean Solar Panels

The Best Way to Clean Solar Panels

  1. Turn Off the Solar Panel System: Before starting the cleaning process, ensure your solar panel system is turned off to prevent any electrical issues or shocks.
  2. Use a Soft Brush or Sponge: Utilize a soft-bristle brush or a sponge to gently remove dirt and debris from the surface of the panels. Avoid abrasive materials that could scratch the glass.
  3.  Use Soapy Water:  Mix a mild detergent with water to create a soapy solution. This will help break down any stubborn grime without harming the panels.
  4. Rinse with Low-Pressure Water: After scrubbing, rinse the panels with low-pressure water to wash away the soap and loosened dirt. Avoid high-pressure washing, as it can damage the panels.
  5. Dry if Necessary: If you notice any streaks or residue after rinsing, you can use a clean, soft cloth to gently dry the panels. However, many panels can air dry without issues.


How Often Should You Clean Solar Panels?

The frequency of cleaning solar panels typically depends on various environmental factors, but a good rule of thumb is to clean them at least twice a year. In areas with high dust levels, construction activities, or heavy pollen, more frequent cleaning may be necessary to prevent dirt accumulation that can obstruct sunlight and reduce efficiency.

Conversely, locations with frequent rainfall might require less maintenance, as rain can naturally wash away debris. Additionally, if your panels are shaded by trees or nearby structures, they may collect leaves and other organic matter, warranting more regular attention. Monitoring your solar panel performance can also guide your cleaning schedule; a noticeable drop in energy output may indicate it’s time for a thorough cleaning. 


Is Professional Solar Panel Cleaning Worth It?

Investing in professional solar panel cleaning can be well worth it, particularly for those seeking to maximize their system’s efficiency and longevity. Professionals have the right tools, expertise, and techniques to safely and effectively clean solar panels without causing damage, ensuring that they achieve optimal energy output.

They can also perform inspections during the cleaning process, identifying potential issues such as cracks or wiring problems that homeowners might overlook. 


Final Thoughts

In conclusion, maintaining clean solar panels is essential for maximizing their efficiency and ensuring long-term performance. Regular cleaning helps prevent dirt and debris from obstructing sunlight, which can significantly impact energy output. While DIY methods can be effective, investing in professional cleaning services offers the advantage of expertise and thoroughness, especially for complex installations. Ultimately, whether you choose to clean your panels yourself or hire a professional, staying proactive about maintenance will help you get the most out of your solar energy system, ensuring it remains a valuable asset for years to come.

Proper way to clean concrete steps

Proper Way to Clean Concrete Steps

Understanding the proper techniques and materials for cleaning can help restore their appearance and prevent further damage. In this guide, we’ll explore the best methods on how to clean concrete steps, from choosing the right tools and cleaning solutions to essential safety precautions. With the right approach, you can keep your concrete steps looking pristine while ensuring a safe environment for all who use them.


Why Cleaning Concrete Steps is Important

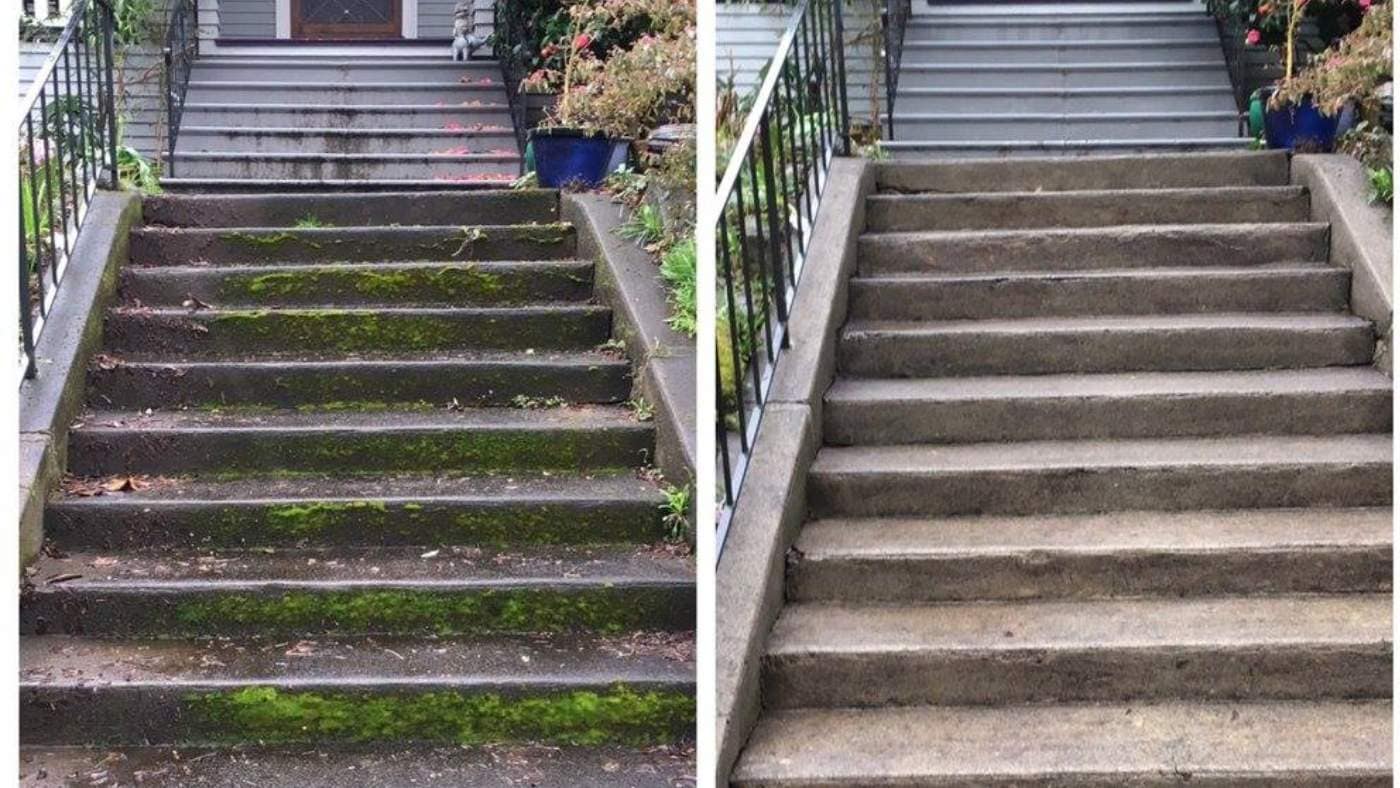
Cleaning concrete steps is crucial for several reasons, primarily focusing on safety and maintenance. Accumulated dirt, grime, and algae can create slippery surfaces, increasing the risk of slips and falls, which can be especially dangerous for children and the elderly. Regular cleaning not only enhances the aesthetic appeal of your home by providing a welcoming entrance, but it also helps prevent damage caused by mold and mildew, which can deteriorate the concrete over time. Furthermore, clean steps contribute to the overall upkeep of your property, reducing the amount of dirt tracked indoors and maintaining a tidy appearance. Ultimately, a well-maintained entrance can positively impact your property value, making it a worthwhile investment in the long run.

Read also: Does pressure washing damage concrete?

How to Clean Concrete Steps With a Pressure Washer

Essential Tools and Materials

Cleaning concrete steps with a pressure washer is an efficient way to remove dirt, grime, and stains. To ensure a successful cleaning process, gather the following essential tools and materials:

  1. Pressure Washer: Choose one with at least 2000 PSI for effective cleaning.
  2. Pressure Washer Nozzles: Use a 25-degree nozzle for general cleaning and a 15-degree nozzle for tougher stains.
  3. Cleaning Solution: Depending on the type of stains, you may need a concrete cleaner or a mixture of water and mild detergent. For tough stains, consider a specialized concrete degreaser.
  4. Stiff-Bristle Brush: Useful for scrubbing stubborn stains or areas that need extra attention.
  5. Safety Gear: Wear safety goggles, gloves, and non-slip footwear to protect yourself from debris and slippery surfaces.
  6. Hose: A regular garden hose may be needed for rinsing before and after pressure washing.
  7. Tarps or Drop Cloths: Protect surrounding areas from debris and overspray.
  8. Broom or Leaf Blower: To clear loose debris before you start.

Step-by-Step Guide to Cleaning Concrete Steps

Step-by-Step Guide to Cleaning Concrete Steps

Step 1: Gather Your Supplies

Ensure you have all the necessary tools and materials, including a pressure washer, nozzles, cleaning solution, a stiff-bristle brush, safety gear, and a broom or leaf blower.

Step 2: Clear the Area

Remove any furniture, plants, or obstacles near the steps. Use a broom or leaf blower to clear away loose dirt, leaves, and debris.

Step 3: Prepare the Pressure Washer

Set up your pressure washer according to the manufacturer’s instructions. Attach the appropriate nozzle (usually a 25-degree for general cleaning).

Step 4: Wet the Steps

Before applying any cleaning solution, lightly spray the concrete steps with water. This helps to loosen dirt and prepares the surface for cleaning.

Step 5: Apply Cleaning Solution

Mix your chosen cleaning solution according to the instructions. Apply it to the concrete steps using a sprayer or a bucket and brush. Focus on stained areas and allow the solution to sit for about 10-15 minutes to penetrate the grime.

Step 6: Scrub Stubborn Stains

For tough stains, use a stiff-bristle brush to scrub the affected areas. This will help break down the grime before pressure washing.

Step 7: Pressure Wash the Steps

Using the pressure washer, start from the top of the steps and work your way down. Maintain a consistent distance (about 12-18 inches) from the surface to avoid damage. Use sweeping motions and overlap your strokes to ensure thorough cleaning.

Step 8: Rinse Thoroughly

After pressure washing, rinse the steps with clean water to remove any remaining cleaning solution and debris.

Step 9: Allow to Dry

Let the concrete steps dry completely before placing any objects back on them. This may take a few hours depending on the weather.

Step 10: Regular Maintenance

To keep your concrete steps looking their best, consider a regular cleaning schedule, especially after heavy use or in rainy seasons.


How Often Should You Clean Them?

The frequency of cleaning concrete steps depends on various factors, but here are some general guidelines:

  1. High Traffic Areas: If your concrete steps are frequently used (like those leading to a front door), aim to clean them every 1-2 months to prevent dirt buildup and stains.
  2. Seasonal Cleaning: In climates with heavy rain, snow, or leaf fall, consider cleaning at the start of each season. This helps remove organic debris and prevent mold or mildew growth.
  3. After Major Weather Events: Clean your steps after heavy rain, snow, or storms to remove debris and prevent slippery conditions.
  4. Visible Stains or Dirt: If you notice stains, grime, or algae, clean them immediately to prevent long-term damage.
  5. Annual Deep Clean: At least once a year, perform a thorough deep clean using a pressure washer or specialized cleaning solutions to maintain the steps’ appearance and integrity.


Final Thoughts

Cleaning your concrete steps is essential for both safety and aesthetics. Regular maintenance not only enhances their appearance but also helps prevent slips and falls caused by dirt, grime, and algae. By following a structured approach—gathering the right tools, clearing the area, applying appropriate cleaning solutions, and using a pressure washer—you can effectively restore your steps to their best condition.

Remember to assess the frequency of cleaning based on usage and environmental factors, ensuring that they remain in good shape year-round. With a little effort and care, your concrete steps can continue to serve as a welcoming entrance to your home while remaining safe and inviting for everyone.


How to Pressure Wash a Deck Without Damaging It

How to Pressure Wash a Deck Without Damaging It

Maintaining your deck is essential to preserving its beauty and longevity. Regular cleaning helps remove dirt, grime, and mildew that can deteriorate the wood or composite material. However, pressure washing, while effective, can be risky if not done correctly. Using improper techniques or settings can cause irreversible damage, leaving your deck splintered or discolored. This guide will explain how to pressure wash a deck safely, ensuring it remains in top condition.

Understanding the Importance of Pressure Washing

Pressure washing is an efficient way to clean your deck, removing built-up dirt and stains that can lead to decay or make your deck look aged. Regular cleaning can extend the life of your deck, making it a valuable part of your home for years to come. However, it’s crucial to understand the right techniques to avoid damaging the wood or composite materials.

Preparing Your Deck for Power Washing

Dirty Deck

  1. Clear the deck: Remove any furniture, plants, or debris from the deck.
  2. Sweep the surface: Thoroughly sweep the deck to eliminate loose dirt and leaves.
  3. Pre-treat stains: If there are visible stains or mold, pre-treat them with a deck cleaner.
  4. Reduce pressure: Proper pre-treatment makes pressure washing more effective, reducing the need for higher pressure, which can be harmful to your deck.

Choosing the Right Pressure Washer Settings

Understanding the correct pressure washer settings is crucial to avoid damaging your deck. PSI (Pounds per Square Inch) and GPM (Gallons per Minute) are the two main factors that determine the power of your pressure washer.

Understanding PSI and GPM: For most decks, a pressure washer with a PSI between 500 and 1,200 is sufficient. Wooden decks, especially older ones, require lower PSI to prevent splintering. Composite decks can handle slightly higher PSI but should still stay below 1,500.

Recommended PSI for Wooden vs. Composite Decks: Wooden decks are more sensitive to pressure and should generally be cleaned with a PSI of around 500-600. Composite decks, being more durable, can be cleaned with up to 1,500 PSI.

Adjustable Nozzle Settings and Their Uses: Adjustable nozzles allow you to change the spray pattern, which can help you target stubborn stains without increasing the PSI. A 40-60 degree nozzle is ideal for deck cleaning, as it provides a wide spray that reduces the risk of damaging the wood.

How to Pressure Wash a Wooden Deck Safely

How to Pressure Wash a Wooden Deck Safely

To pressure wash your wooden deck safely, start with a low PSI setting and test it on a small, inconspicuous area. Hold the nozzle at least 12 inches from the surface and move it in a sweeping motion along the grain of the wood. This prevents gouging or splintering the wood. Avoid focusing on one spot for too long, as this can create uneven patches.

Common Mistakes to Avoid When Pressure Washing a Deck

Using Too Much Pressure: One of the most common mistakes is using too high of a PSI, which can damage the wood fibers and leave your deck looking rough and uneven.

Washing Against the Grain: Always wash along the grain of the wood. Going against the grain can cause splintering.

Holding the Nozzle Too Close: Keep the nozzle at least 12 inches away from the deck surface to prevent deep gouges or stripping the wood.

Hiring a Deck Pressure Washing Expert


If you’re unsure about pressure washing your deck or want to ensure the job is done correctly, consider hiring a professional. An expert in deck pressure washing will have the right tools and knowledge to clean your deck without causing damage. This can be a worthwhile investment, especially for older or more delicate decks.

Conclusion

Pressure washing your deck is an excellent way to maintain its appearance and longevity, but it requires the right approach. By understanding the proper settings, techniques, and common mistakes, you can safely clean your deck without risking damage. Whether you do it yourself or hire a professional, keeping your deck clean will help it remain a beautiful and functional part of your home for years to come.

How To Pressure Wash A Fence

how to pressure wash a fence

Washing a fence with water is one of the best techniques for bringing back the look of any fence to its original appearance and adding years to its service. No matter which area of the fence is dirty, moldy, or has old paint, a good rinse with a pressure washer will help.

Below is the process for pressure washing a fence:


Preparing for Fence Pressure Washing

Gather Equipment and Materials

This work is best done with a pressure washer, an assortment of nozzles, a cleaning solution, gear protection, and a scrub brush.

Inspect the Fence

Upon observation of the current state of the fence, one should check if there are certain areas of the fence that may be rendered worse by the pressure washing operations. This means that one has to promptly repair the areas as necessary before proceeding.

Clear the Area

It is advised to get rid of anything touching the fence surface in the specific area where the work is going to be conducted, for example, furniture or plants.


How to Pressure Wash a Fence

how to pressure wash a fence

1. Attach Nozzle and Adjust Pressure

It is recommended to choose a nozzle with a wide spray pattern to prevent damaging the wood. Select a submersion operation mode of the pressure washer at a medium setting.

2. Wet the Fence

The process starts with liberal soaking of the fence with water, free from bleach. This assists in softening the dirt and buildup.

3. Apply Cleaning Solution

Use a cleaning solution; this can be done using a low-pressure nozzle or a garden sprayer. Scrub it with more force for about five minutes to break the dirt that has not been easily removed by the cleaner.

4. Pressure Wash in Sections

When pressure washing, start from the top and move to the lower sections of the fence. Stay close enough to the wood to notice this happening, but not too close that it harms the wood.

5. Rinse Thoroughly

It is recommended to first clean using water and detergent, then rinse off the fence with clean water only, to remove any remaining detergent and dust.

6. Check for Remaining Stains

Look for areas on the fence that require extra cleaning. Spot clean as necessary.

7. Allow the Fence to Dry

Allow the fence to dry before applying sealants or stains.


Hiring a Pressure Washing Expert

If you’re still uncertain about tackling the task yourself, it’s wise to hire a professional or expert. They have the necessary tools and expertise to complete the job safely and efficiently, minimizing risks to everyone’s safety. Choosing a professional fence pressure washer ensures that the work is done to a high standard, giving you peace of mind and saving you time and effort in the process.

Conclusion

Cleaning a fence is always a simple and efficient way to make the fence look beautiful, as well as increasing its lifespan. For any cleaning that one does on their own or hires someone else to do, these are the recommended steps to follow. In addition to the appealing aspect, a maintained fence gives your outdoor area, and the entire property, a boost in its overall attraction and worthiness for future years.


How to Pressure Wash a Garage Floor

Pressure Washing Garage Floor

A garage floor is heavily used and exposed to dirt, oil, and grime, among other things, in the course of its usage.

This is where pressure washing can come in handy to bring back its clean look and feel. To properly pressure wash a garage floor, you need to follow the steps and precautions outlined below.

Why Pressure Wash a Garage Floor?

Apart from increasing the beauty of your garage, pressure washing also eliminates oil stains, dirt, and other materials that may damage the surface of the garage over time. Cleaning your garage floor is important as it will help increase the lifespan of the floor and, at the same time, create a safer environment.

Essential Tools and Materials

Before you begin the task, there are some items and accessories that you will need, such as:

  • A pressure washer with an appropriate nozzle (between 25-40 degrees)
  • A stiff brush or broom
  • Concrete cleaner or degreaser
  • Safety glasses
  • Gloves
  • Other protective clothing

Pressure Washing Garage Floor Steps

Steps to Pressure Wash a Garage Floor

  1. Clear the Area: Empty the garage floor of all items, including cars, tools, and equipment.
  2. Sweep the Floor: Before pressure washing, sweep the floor with a broom to remove any dust and loose materials.
  3. Pre-Treat Stains: For oily or hard-to-wash stains, use a concrete degreaser or detergent. Let it stand for the time suggested by the product label.
  4. Start Pressure Washing: Connect your pressure washer to the electrical outlet and water supply. Begin washing from one corner of the garage (opposite the door) and wash towards the door. Avoid focusing the pressure at a single point on the surface.
  5. Rinse the Floor: After washing the entire surface, switch to a broader nozzle to rinse off any remaining detergent or cleaner.
  6. Allow to Dry: Before returning any items to the garage, allow the floor to dry completely.

Safety Tips

  1. Safety glasses and gloves should be used to protect from flying debris and splashes of water.
  2. Make sure that you stand away from the pressure washer and any objects that you do not wish to get damaged or injured.
  3. It is not recommended to apply it directly on the cracks concrete or joints because it will lead to water infiltration on the structure.
  4. Always read and follow the manufacturer’s instructions and safety warnings before operating the pressure washer.
  5. Keep children and pets away from the area being cleaned to avoid accidental injury.

Hire a Garage Pressure Washing Service

If you prefer not to do this yourself, consider hiring a professional garage pressure washing service. They are well-equipped and competent to provide a thorough and effective cleaning job, ensuring efficiency and minimal hassle for you. Professionals can also handle any specific requirements or challenges your garage may present, giving you peace of mind.

Conclusion

Pressure washing a garage floor is useful for cleaning the garage and removing stains from the concrete floor. By following the above steps and precautions, you can restore the appearance and functionality of your garage floor, making it a safer and more comfortable place for your car(s) and other uses.

Does Pressure Washing Damage Concrete?

Does pressure washing damage concrete

Does pressure washing damage concrete


As homeowners excitedly plan for summertime DIY exterior upgrades freshening drab surroundings, ambitions scrapping caked mud off driveways or grease stains blighting garage floors through convenient rental pressure washers require pausing assessing delicate project surface materials tolerances first avoiding regrettable property damages still plaguing properties long afterwards.

Especially where aesthetically critical concrete pavements like patterned walkways, exposed aggregate pool decks, and delicate natural stone patios risk irreversible etching or structural weakening just from moderate cleaning attempts without proper pressure adjustments and cautious matching of composition integrity – we elucidate risks, definitively answering “Does pressure washing damage concrete?” while illustrating best practice workmanship to protect your investments long-term, the right way.

Evaluating Pressure Washing Risks on Bare Concrete

The verdict – uncontrolled direct pressure washing absolutely risks damaging bare concrete surfaces aggressively beyond mere cleaning intentions through excess intensity eroding delicate matrix layers quicker than mild stained buildup reasonably would otherwise be essentially harmless by comparison long run.

Much depends on individual factors like factory-finished sealer protections potentially applied during concrete installation finishing phases or skin curing periods shortly thereafter, underlying slab mix designs overall strength durability against unintended forced water penetration under high pressure likely enlarging subsurface hairline cracking over repeat maintenance washings gradually, plus operative wand nozzle spray angles relative standard psi whether concentrated harsh narrowly or diffused moderately instead across wider swaths minimizing single point deterioration.

testing hidden hairline crack sturdiness conditions early determines manifesting right before the eyes as unoptimized high-pressure water jets forcibly drive through weaker cementitious planes degrading integrity quickly. Even light-duty residential pressure washers operating near 1,500 PSI wielded carelessly perpendicular destroying sound concrete surfaces irreversibly when narrowed stream focused lingering too long held stationary drilling porous holes resembling Swiss cheese nightmares much costlier replacing right than preventing ever!

Related article: How to use a pressure washer

Professional Concrete Cleaning Done Right

Reputable licensed power washing contractors bring specialized concrete surface cleaning experience determining the safest effective cleaning pressure methods only after fully inspecting the current driveway, patio or walkway integrity conditions first rather than needlessly risking excessive cement erosion damage issues blasting sites overzealously with overly simplistic one-size fits all assumptions often irreversibly destroying customers’ existing quality concrete investments pushed without evaluating unique assets situations.

Adjusting Cleaning Pressures Minimizes Erosion Risks

In reality, when performed correctly by seasoned experts intimately understanding handling delicate material compositions, gradually stepped pressure washing PROTECTS quality concrete strength much better long run than harsh scraping or grinding equipment rental alternatives aggressively removing beneficial factory finished sealer protections that otherwise shield gradual abrasive weathering erosion expected over decades useful lifespans.

These professionals-grade adjustable power washers allow incrementally modulating ideal cleaning pressure intensities determined matching specialized project requirements across multiple delicate surface conditions specifically. High-precision wands fitted with desired fan spray nozzle suites then concentrate solution contact focusing wastewater contaminations extraction where intended rather than spreading everywhere down streets or flooding uncontained surrounding soil beds environmentally better controlled professionally.

Experience Matters Protecting Customized Concrete Assets

Through highly customizable bundled exterior cleaning project packages inspecting unique sites first and then providing bespoke handling procedures for both residential and commercial clients developing facilities over their 25 years of trade experience reliably, reputable licensed power washing crews understand nuanced skills acquired distinguishing nearly identical concrete cleaning challenges actually requires a striking balance between just enough juices dissolving muddied stuck-on particles without overly disturbing sturdier stains that penetrate deeper requiring solvents or accepting some patina buildup over decades as naturally expected bringing honest character uniquely tells visual property stories left intact. Contact pressure washing pros ready to restore your house concrete  to a sparkling beauty this season, responsibly and effectively, the first time around!

Call ForceWashing.com to connect with thoroughly vetted industry front-running pressure washing pros waiting to assist you in revitalizing  property exteriors – done carefully right-protecting integrity by bonded and insured specialists who respect customers’ concrete investments too much learning costly damage lessons underestimating pressure tolerances out to save a few pennies shortsighted. Why risk DIY property flops working with underqualified “budget pre-sure washers’ when a proven partnership with professionals is always the smarter choice goes the distance!

Chemical Roof Cleaning: What chemicals are used to clean roofs?

Chemical Roof Cleaning

Chemical Roof Cleaning

Chemical roof cleaning has become an essential method for maintaining the aesthetic appeal and structural integrity of roofs. By effectively removing algae, moss, lichen, and other organic matter, chemical cleaning roof techniques help prolong the lifespan of roofing materials. This article covers the most commonly used chemicals in roof cleaning, along with their benefits and safety considerations.

1. Sodium Hypochlorite (Bleach)

Sodium hypochlorite, commonly known as bleach, is a powerful disinfectant and cleaning agent widely used in roof cleaning solutions.

Benefits:

  • Effectiveness: Sodium hypochlorite is highly effective at killing algae, moss, and lichen.
  • Fast-Acting: It quickly breaks down organic matter, leading to immediate results.
  • Availability: Readily available and relatively inexpensive.

Safety Considerations:

  • Protective Gear: When using bleach, it’s essential to wear protective gear, including gloves and goggles, to prevent skin and eye irritation.
  • Dilution: Bleach must be properly diluted to avoid damaging the roof shingles and surrounding vegetation.

2. Sodium Hydroxide

Sodium hydroxide, or caustic soda, is a strong alkaline compound used in many industrial cleaning agents, including those for roofs.

Benefits:

  • Deep Cleaning: Excellent for removing stubborn stains and deeply embedded dirt.
  • Degreasing: Effective at breaking down oils and organic materials.

Safety Considerations:

  • Corrosive Nature: Sodium hydroxide is highly corrosive and can damage roofing materials if not used correctly.
  • Handling Precautions: Requires careful handling and appropriate safety measures to prevent chemical burns.


3. TSP (Trisodium Phosphate)

Trisodium phosphate is a water-soluble compound often used in heavy-duty cleaning products.

Benefits:

  • Versatile Cleaner: Effective against mildew, mold, and general grime.
  • Surface Preparation: Often used to prepare surfaces for painting by thoroughly cleaning them.

Safety Considerations:

  • Environmental Impact: TSP can be harmful to the environment, particularly aquatic life, if not disposed of properly.
  • Protective Measures: Gloves and eye protection are recommended during use.


4. Potassium Hydroxide

Potassium hydroxide, another strong alkaline cleaner, is used for its effectiveness in breaking down organic materials.

Benefits:

  • Strong Cleaner: Highly effective at removing tough stains and organic growth.
  • Multi-Purpose: Can be used for various cleaning tasks beyond roofs.

Safety Considerations:

  • Corrosive Properties: Like sodium hydroxide, it is corrosive and requires careful handling.
  • Usage Precautions: Proper dilution and safety gear are necessary to prevent injury.


5. Hydrogen Peroxide

Hydrogen peroxide is a mild antiseptic commonly used in cleaning applications due to its oxidizing properties.

Benefits:

  • Eco-Friendly: Breaks down into water and oxygen, making it environmentally friendly.
  • Safe for Most Materials: Generally safe for use on a variety of roofing materials without causing damage.

Safety Considerations:

  • Concentration: Higher concentrations can be hazardous and require dilution.
  • Storage: Needs to be stored in a cool, dark place to prevent decomposition.


6. Copper Sulfate

Copper sulfate is a chemical compound known for its antifungal and antimicrobial properties.

Benefits:

  • Effective Algaecide: Particularly effective against algae and moss.
  • Long-Lasting Results: Provides a longer-lasting solution compared to other chemicals.

Safety Considerations:

  • Metal Corrosion: Can corrode metals if not used carefully.
  • Environmental Impact: Toxic to aquatic life, so it must be used and disposed of responsibly.


7. Ammonium Sulfate

Ammonium sulfate is an inorganic salt with various agricultural and cleaning applications.

Benefits:

  • Fungicide: Effective against fungi, moss, and lichen.
  • Versatility: Can be combined with other cleaning agents for enhanced results.

Safety Considerations:

  • Skin Irritation: Can cause skin and eye irritation upon contact.
  • Application: Should be applied with proper protective gear to minimize health risks.


Wrapping Up

Chemical roof cleaning techniques are invaluable for maintaining roof health and appearance. By understanding the benefits and safety considerations of each chemical, homeowners and professionals can choose the most appropriate solution for their specific needs. Always prioritize safety by using the correct dilution ratios and protective gear, and consider the environmental impact of the chemicals used. For more detailed guidance and professional chemical roof cleaning services, refer to experts in the field .

How Often Should You Pressure Wash Your House?

How Often Should You Pressure Wash Your House?

How Often Should You Pressure Wash Your House?

Keeping the outside of your house clean is important. Over time, dirt, mold, and other grime can build up on the walls, driveway, deck, and other outdoor areas. This makes your home look old and dirty. Pressure washing uses a powerful stream of water to blast away this buildup from surfaces. But how often should you pressure wash your house?

Regularly pressure washing the exterior removes unsightly stains and growth. It protects your home’s siding, walkways, and decks from damage caused by mold, mildew, and dirt. Pressure washing is an easy way to make the outside of your house look fresh and new again. It increases your home’s curb appeal and value.


Understanding Pressure Washing Importance

Pressure washing is important for keeping the outside of your home looking good and preventing damage. It uses a high-powered stream of water to blast away built-up dirt, mold, mildew, and other yucky gunk from surfaces like siding, decks, walkways, and driveways. More than just making things look clean and new again, pressure washing protects these exterior areas by removing the mold, mildew, and dirt that can cause rot, decay, and structural harm over time if left uncleaned. By pressure washing regularly, you easily get rid of this harmful buildup that eats away at outdoor materials, thereby prolonging the life of your home’s surfaces and preventing costly repairs down the road.


Read: 16 Benefits of Pressure Washing Your Home


Factors Influencing Exterior Pressure Washing Frequency


Location

The climate and environmental conditions where your home is located greatly impact how often you’ll need to pressure wash. Homes in humid or coastal areas tend to require more frequent washings, perhaps every 6 months. The moisture in the air allows mold, mildew, and grime to accumulate quickly on exterior surfaces. Drier climates may only need an annual washing. Paying attention to how rapidly contaminants build up on your home’s siding, deck, driveway, etc. can guide your pressure washing schedule.


Mold/Mildew Buildup

Mold and mildew growth, common in shady areas or spots with poor drainage and moisture control, create an unsightly appearance when allowed to spread. But beyond just visuals, these fungal buildups can be hazardous if left unchecked. Mold can produce allergenic spores that impact respiratory health. Mildew can cause permanent staining and “eat away” at surfaces. Frequent pressure washing prevents mold/mildew buildup by blasting away growth as soon as it appears. For heavy infestations, additional chemical treatments may be required along with pressure washing.


Repainting

If your home’s exterior is due for a new paint job, pressure washing is a crucial preparatory step that ensures professional-quality results. The high-pressure water spray removes all loose, chipped, and flaking paint from previous coats. It also cleans away any dirt, chalk, mildew, and environmental contaminants accumulated on the surface. This provides an ideal clean slate that allows for maximum adhesion and durability of the new paint. How recently you’ll need to pressure wash depends on your paint’s current condition – if it’s severely degraded, washing just before repainting is recommended.


After Storms

Major weather events like thunderstorms, hurricanes, or blizzards can wreak havoc on your home’s curb appeal by plastering the exterior with mud, debris, dirt, and residues. While appearing unsightly, these accumulations can actually cause damage by trapping moisture that allows mold/mildew growth and contributes to materials breakdown over time. It’s advisable to promptly pressure wash after severe storms to restore your home’s clean appearance and protect exterior materials from lingering pollutants. The precise washing frequency depends on the intensity of the storms hitting your area each year.


Selling Your Home

When listing your house for sale, you’ll want to ensure its exterior looks impeccably clean and well-maintained to maximize curb appeal and resale value. An unkempt facade can turn off potential buyers. Pressure washing is an easy way to instantly revive your home’s appearance and make a strong first impression. The high-pressure spray revives weathered surfaces by stripping away built-up grime and stains. It’s recommended to pressure wash 1-2 weeks prior to listing, allowing time for any repairs/paint touch ups as needed after the surfaces dry. This minimal investment can substantially increase perceived home value for buyers.


Conclusion

Pressure washing the outside of your home regularly is very important. It keeps everything clean and prevents damage from dirt, mold and mildew buildup. Understanding when to pressure wash based on your climate, repainting needs, major storms, and home selling are key. Following a routine schedule for pressure washing maintenance ensures your house always looks great and lasts for many years. By pressure washing at the right times, you protect your home’s exterior surfaces and materials. This small effort provides big rewards for your home’s beauty and value over the long run. If you need professional pressure washing services please call us right away.

Should You Pressure Wash Vinyl Siding?

Should You Pressure Wash Vinyl Siding

Should You Pressure Wash Vinyl Siding

When it comes to maintaining our homes, it is easy to overlook the cleaning of the home’s siding. This may be especially true when it comes to vinyl siding.

Then, there is the question: Should you pressure wash vinyl siding? The answer to that is yes if you can do it safely.

Benefits of Pressure Washing Vinyl Siding

There are several benefits of pressure washing vinyl siding. These benefits include the following:

  • Better curb appeal and appearance
  • Prevents mildew and mold damage
  • Prevents infestation of pests
  • A longer-lasting cleaned siding
  • More property value from maintaining a clean home
  • Family health protection against algae, mold, mildew, etc.

When to Consider Pressure Washing

Pressure washing vinyl siding every couple of years is sufficient if it is visibly clean. Otherwise, it should be done once a year when there is visible mildew, grime, or dirt on the siding.


Dangers of Pressure Washing Vinyl Siding

Please note that pressure washing problems may occur when pressure washing siding recklessly. Caution is required to prevent the vinyl siding from denting or cracking. Other problems may include paint damage and water getting into places it shouldn’t go.


How to Pressure Wash Vinyl Siding Safety

If you still plan on pressure washing your vinyl siding instead of hiring a professional, you must adhere to specific instructions to do so safely. One thing you must do is to lower the water pressure. Doing this will prevent damage and ensure water doesn’t go behind the siding. Other steps include using pressure washer detergent, applying overlapping and smooth strokes of the detergent solution, and using a brush for tough spots.

Once you work the solution on the siding, let it sit for five to 10 minutes to ensure the grime, mildew, and stains are broken down. Then, use a low-pressure spray at a distance that is not too close to the siding. Remember, pressure washing that is too strong and too close may damage the siding.

You should start at least five feet from the surface and move gradually closer if needed for additional cleaning, Additional cleaning may include areas with stubborn dirt or grime that are harder to rinse off, for instance. Other things to be mindful of when spraying include:

  • Not directly spraying at light fixtures, vents, or eaves.
  • Pointing the wand downward to ensure you don’t spray under the horizontal sliding laps
  • Start spraying at the top and work downward for a totally soap-free area.

Read more here about: How to Use a Pressure Washer Safely to Clean Your House Exterior

Call a Professional Pressure Washing Service

Pressure washing your vinyl siding is great if it is done correctly and safely. Otherwise, you are likely to have pressure washing vinyl siding problems.

So, should you power wash vinyl siding? If you can work the wand appropriately, use the right distance and water pressure, and use the right washer detergent and solution, then you should. If you can’t honestly say you can handle this job, it will behoove you to hire a proven professional pressure washing service.

A top-notch professional pressure washing service has the expertise, supplies, and equipment to do the job. While a standard pressure washer may not reach certain areas of the siding at the top level of the house, a professional will have the equipment to reach those hard-to-reach areas. They are also insured, so you can rest assured that your vinyl siding will be in great hands when you work with them.


Conclusion

There are several benefits of pressure washing vinyl siding, ranging from increased property value to improved curb appeal and appearance. Pressure washing vinyl siding every couple of years is sufficient if it is visibly clean. Otherwise, it should be done once a year when there is visible mildew, grime, or dirt on the siding. So, getting your vinyl siding pressure washed routinely and safely is vital.